
Convert form submissions to PDF with monday.com
Collect form submissions with monday.com and instantly convert them to PDFs. Use your own .docx template to match your brand.
Generate PDFs manually or automatically with custom recipes triggered by form submissions ("When item created") or status changes.
You can even email the generated PDFs automatically to the requester using a custom email template.
What's the workflow?
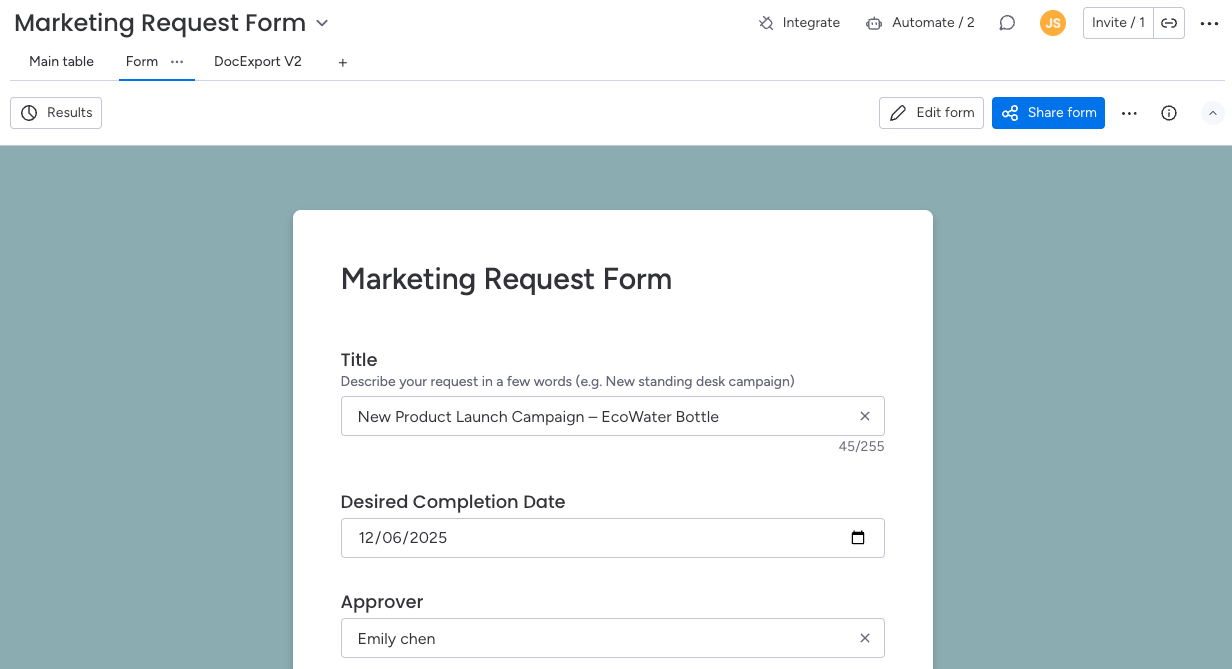
Form submissions often contain long text fields that are hard to read in monday.com's board view, making it difficult to review or share detailed entries.
With this workflow, each form submission is automatically converted into a clean, well-formatted PDF using your own template. The PDF can then be emailed directly to the requester or any stakeholder. Perfect for sharing summaries without giving board access.
In our example, we are the marketing department receiving and managing marketing requests through a form submission process.
Of course, it will also work for other use cases. Some examples:
- Employee Onboarding
- Event Registration
- Travel Request
- Vendor Application
- Performance Feedback
How to install DocExport
After installing DocExport PDF Generator via the monday.com marketplace to your account, you can add DocExport to your boards.
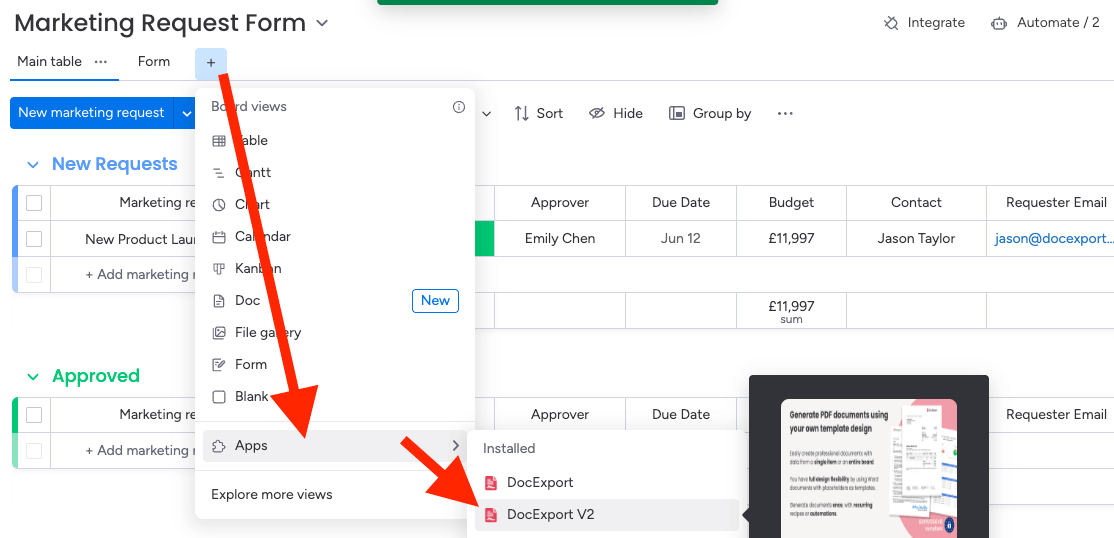
Click on Add View > Apps > DocExport v2.
If you can't see it here, click on Explore more apps and search for DocExport.
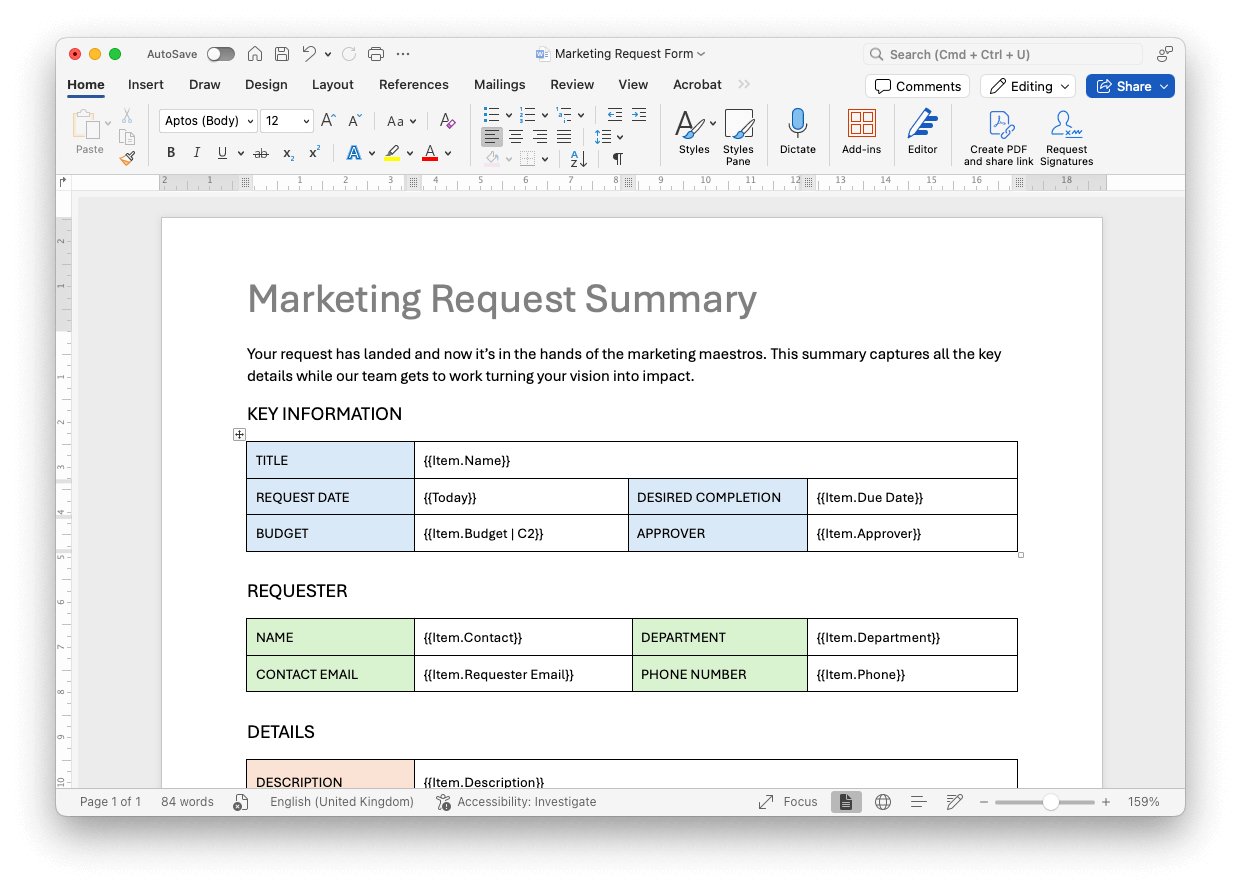
Create your template
You can create your own template from scratch or download our template from this example:
Open the .docx template in Microsoft Word or Google Docs to change the style of the document by adding your logo, header, footer or changing the font, font size, ...
Working with placeholders:
{{Item.Column Title}}
If you want to insert the content from your "Target Audience" column, the placeholder would be {{Item.Target Audience}}
Download the example docx template to see the logic.
Visit our help center for more detailed instructions on customizing your template or adding more information from your monday.com board.
As soon as you're happy with your template, upload it as a docx file to DocExport to instantly see a preview. If you want to make further changes, simply repeat the steps and upload another version of your docx file:
Generate PDF
The next step is to upload your docx template.
Select the DocExport v2 board view, click on Upload custom Word template and Upload new template.
You'll instantly see a preview of your PDF:
Custom Email Template (optional)
Usually, the next step would be to automate the PDF creation. However, as we want to send the request summary PDF with a custom email template to our requester, we will create this first. This step is optional though and documents can also be emailed, using the default email template.
Note: Custom email templates are included in our professional plan. You can skip this step if you want to use our default email template.
To set up a custom email template, click on More > Email templates > Add Email Template.
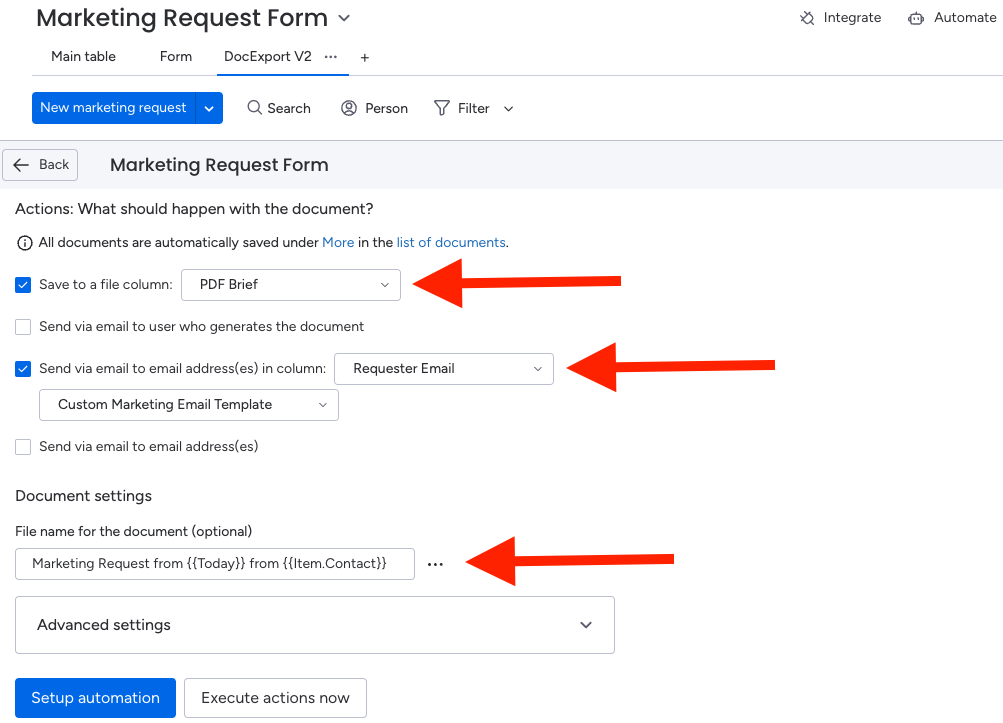
Setting up Actions
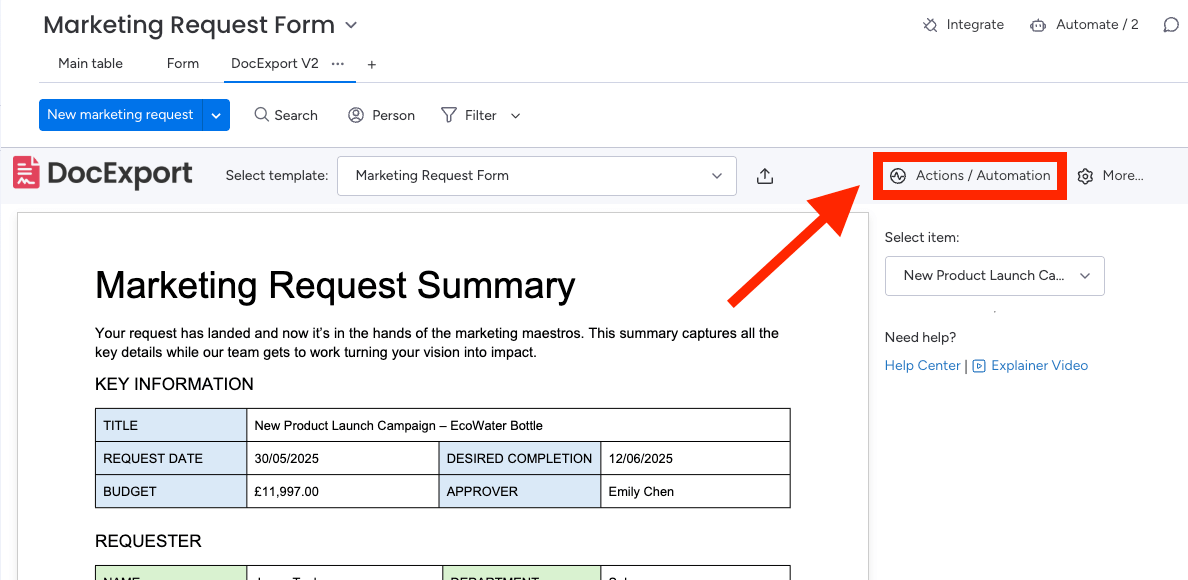
Here you can specify what should happen with your document after creating it. In this example, we want to:
- Save it to a file column (PDF Brief)
- Send an email with the PDF attached to the email address in the "Requester Email" column by using the custom email template "Custom Marketing Email Template"
- Give it a custom file name: Marketing Request from {{Today}} from {{Item.Contact}}
Last step: Automating the process
We want the actions above to be triggered automatically as soon as we receive a new request.
Click Integrate in the top right corner of your board and search for DocExport.
Don’t worry if it doesn’t appear straight away - it might take a few seconds to pop up, especially if you’re loading it for the first time.
We want to trigger the automation on every new form submission, and therefore select “When an item is created create document using DocExport recipe”.
That's it! Let's give it a try by going back to the form and submitting a test request.
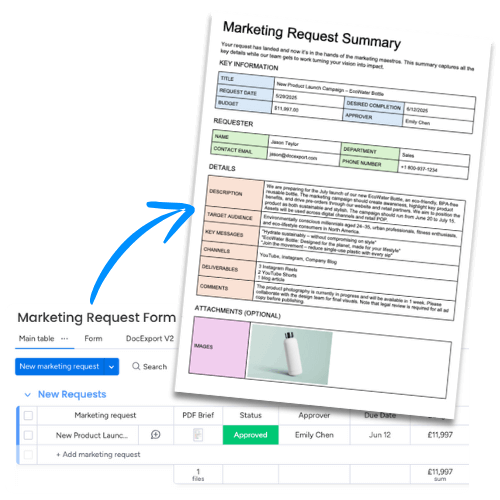
The "Marketing Request Summary" is generated and saved in the file column. At the same time, our requester also received an email with our custom email template and the PDF attached.
Help
You are stuck? Don't hesitate and contact us at support@docexport.com.
We are happy to help you!