
Generate documents
Keeping it easy! Out step-by-step assistant will guide you through the whole process.
Generate a document for your entire board
Generate a document including data from the entire board incl. all items.
e.g. project report, timesheets, tasks, product/service list, lead pipeline, ...
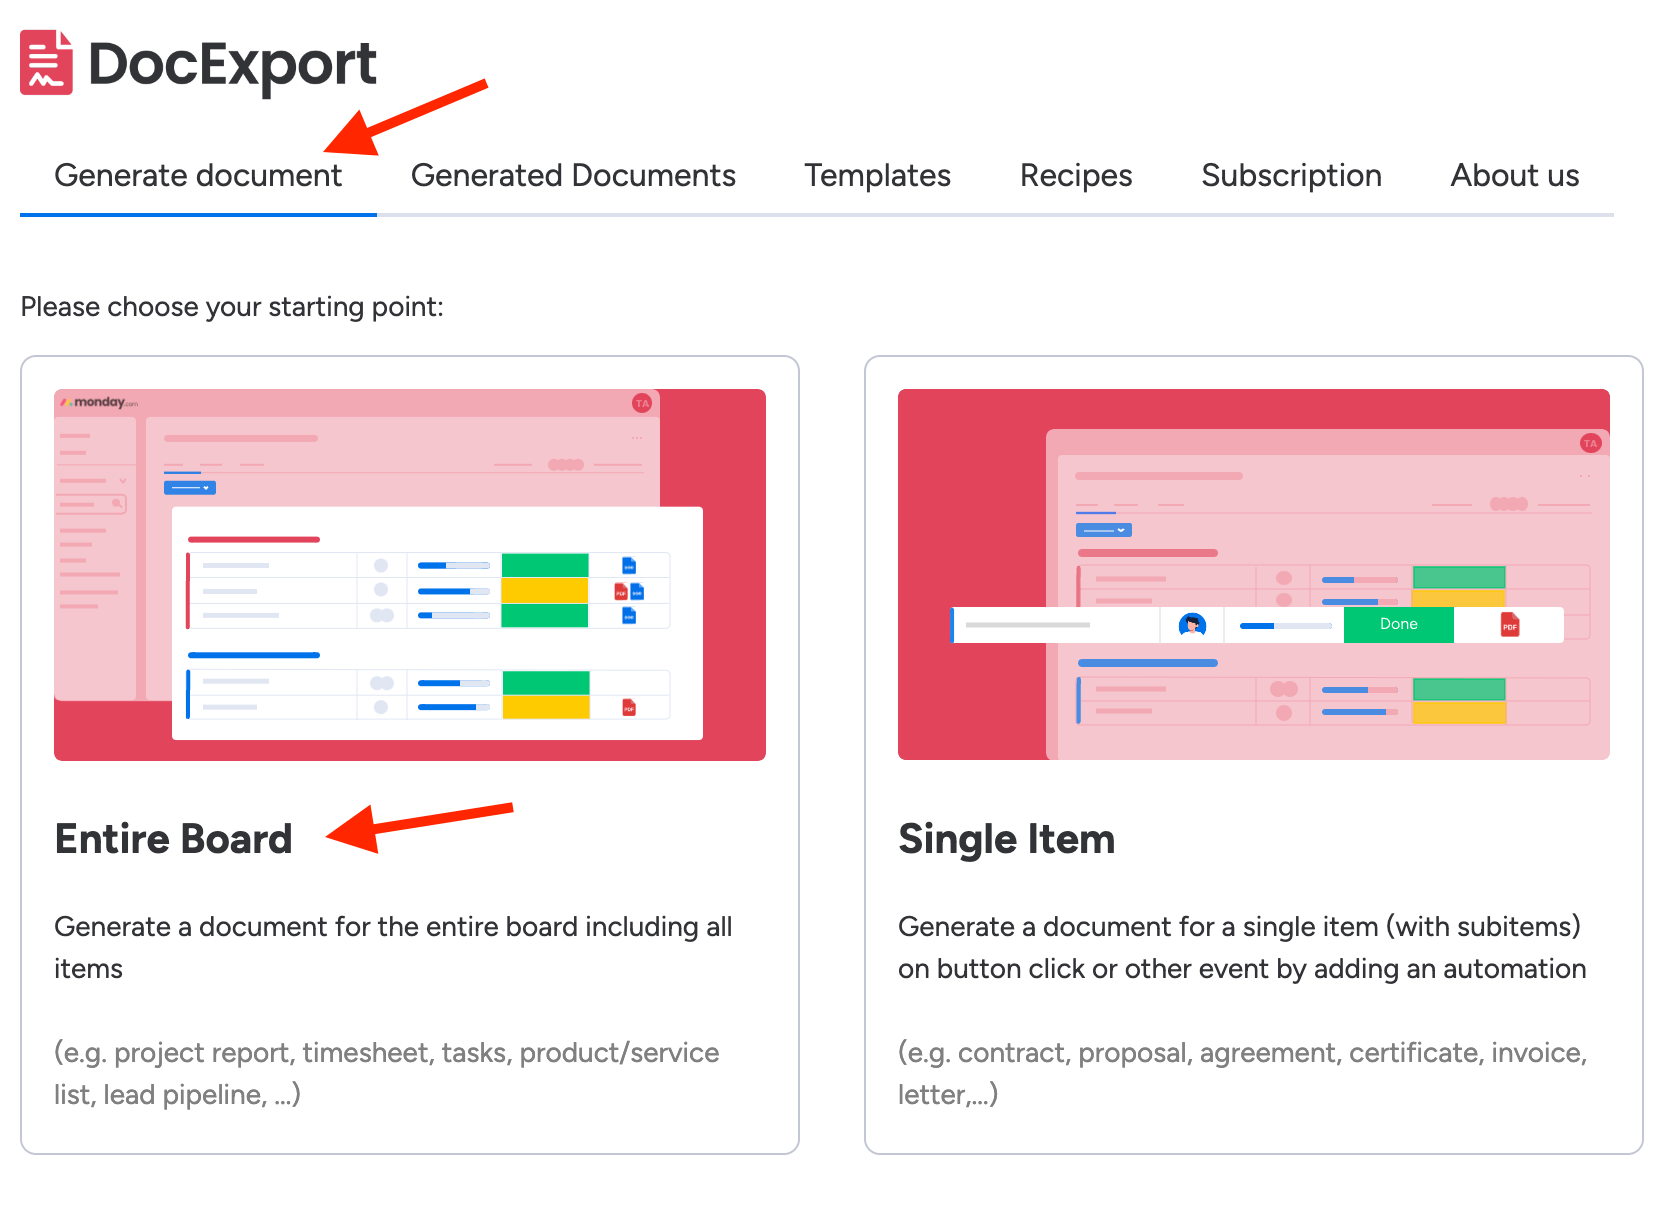
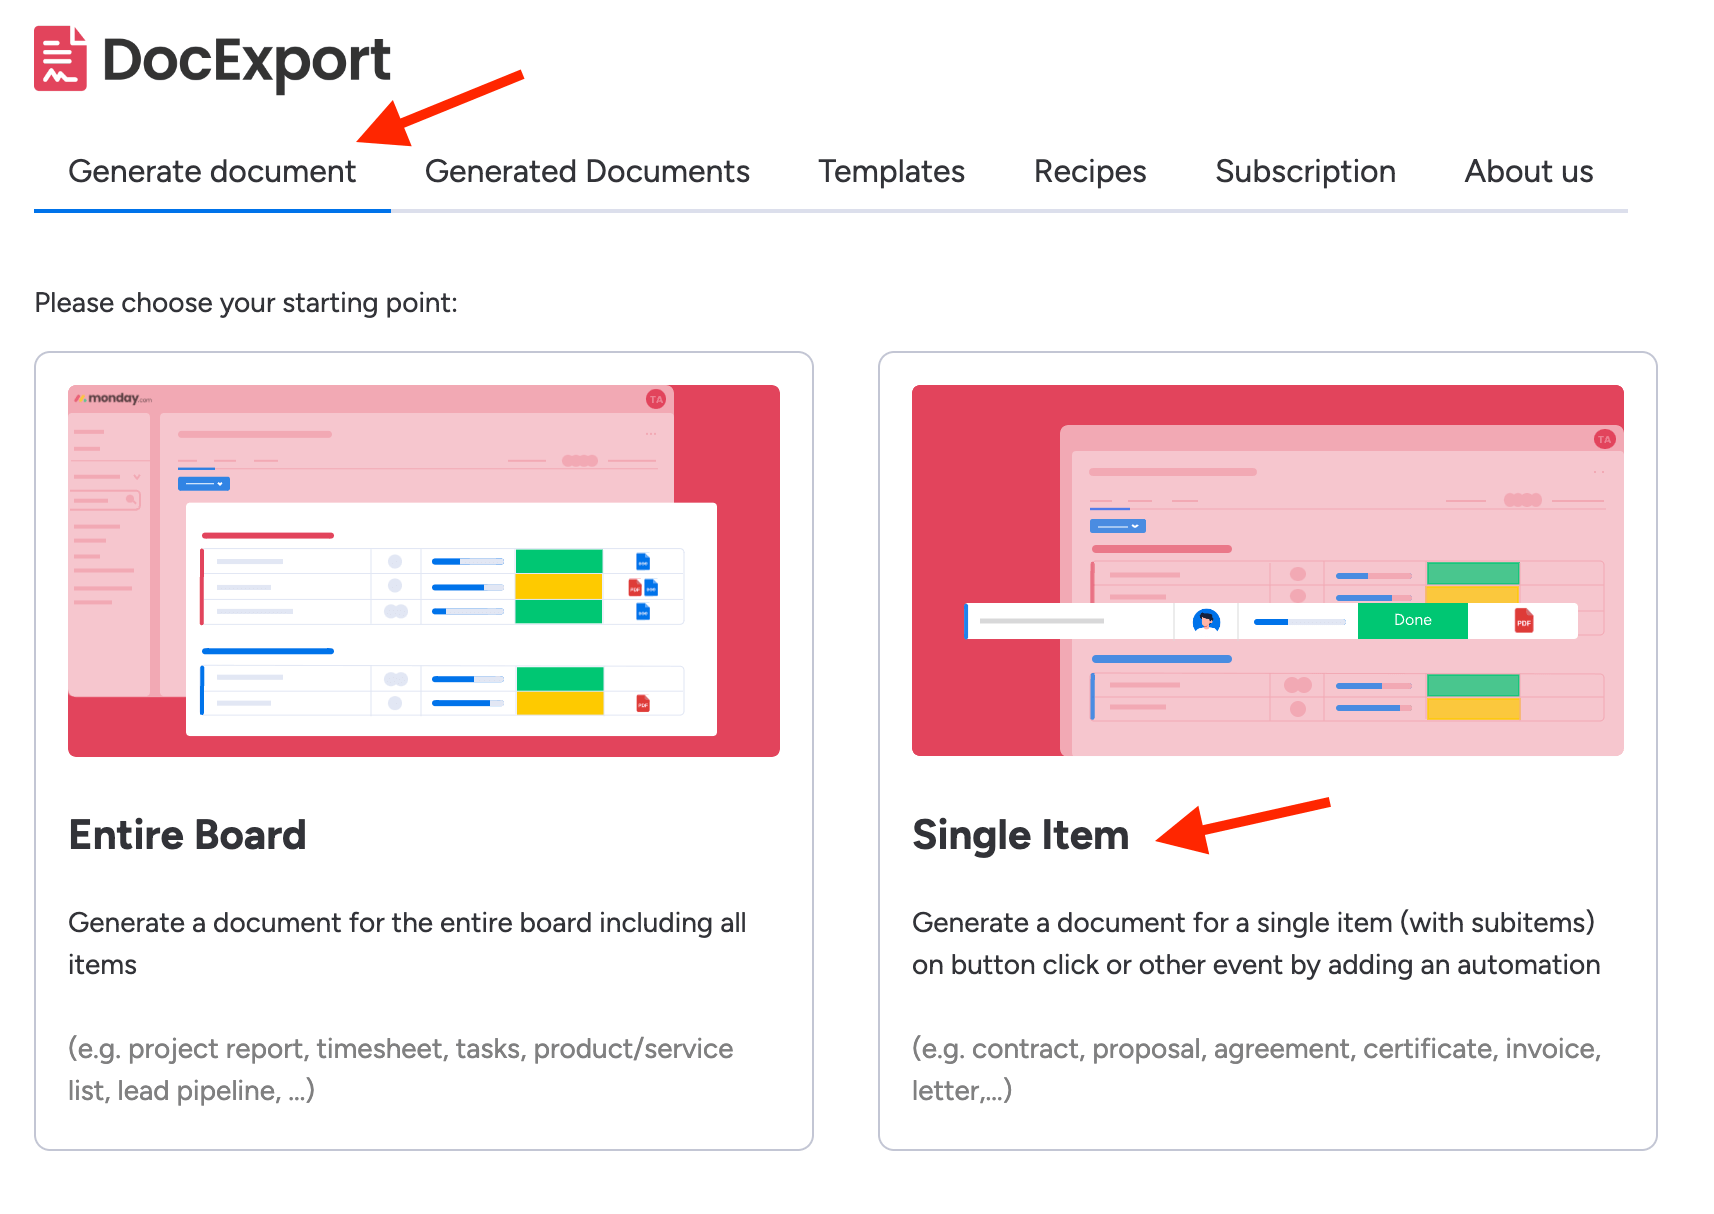
Choose your starting point
- Open the DocExport View and select the tab "Generate document"
- Click on "Entire Board".
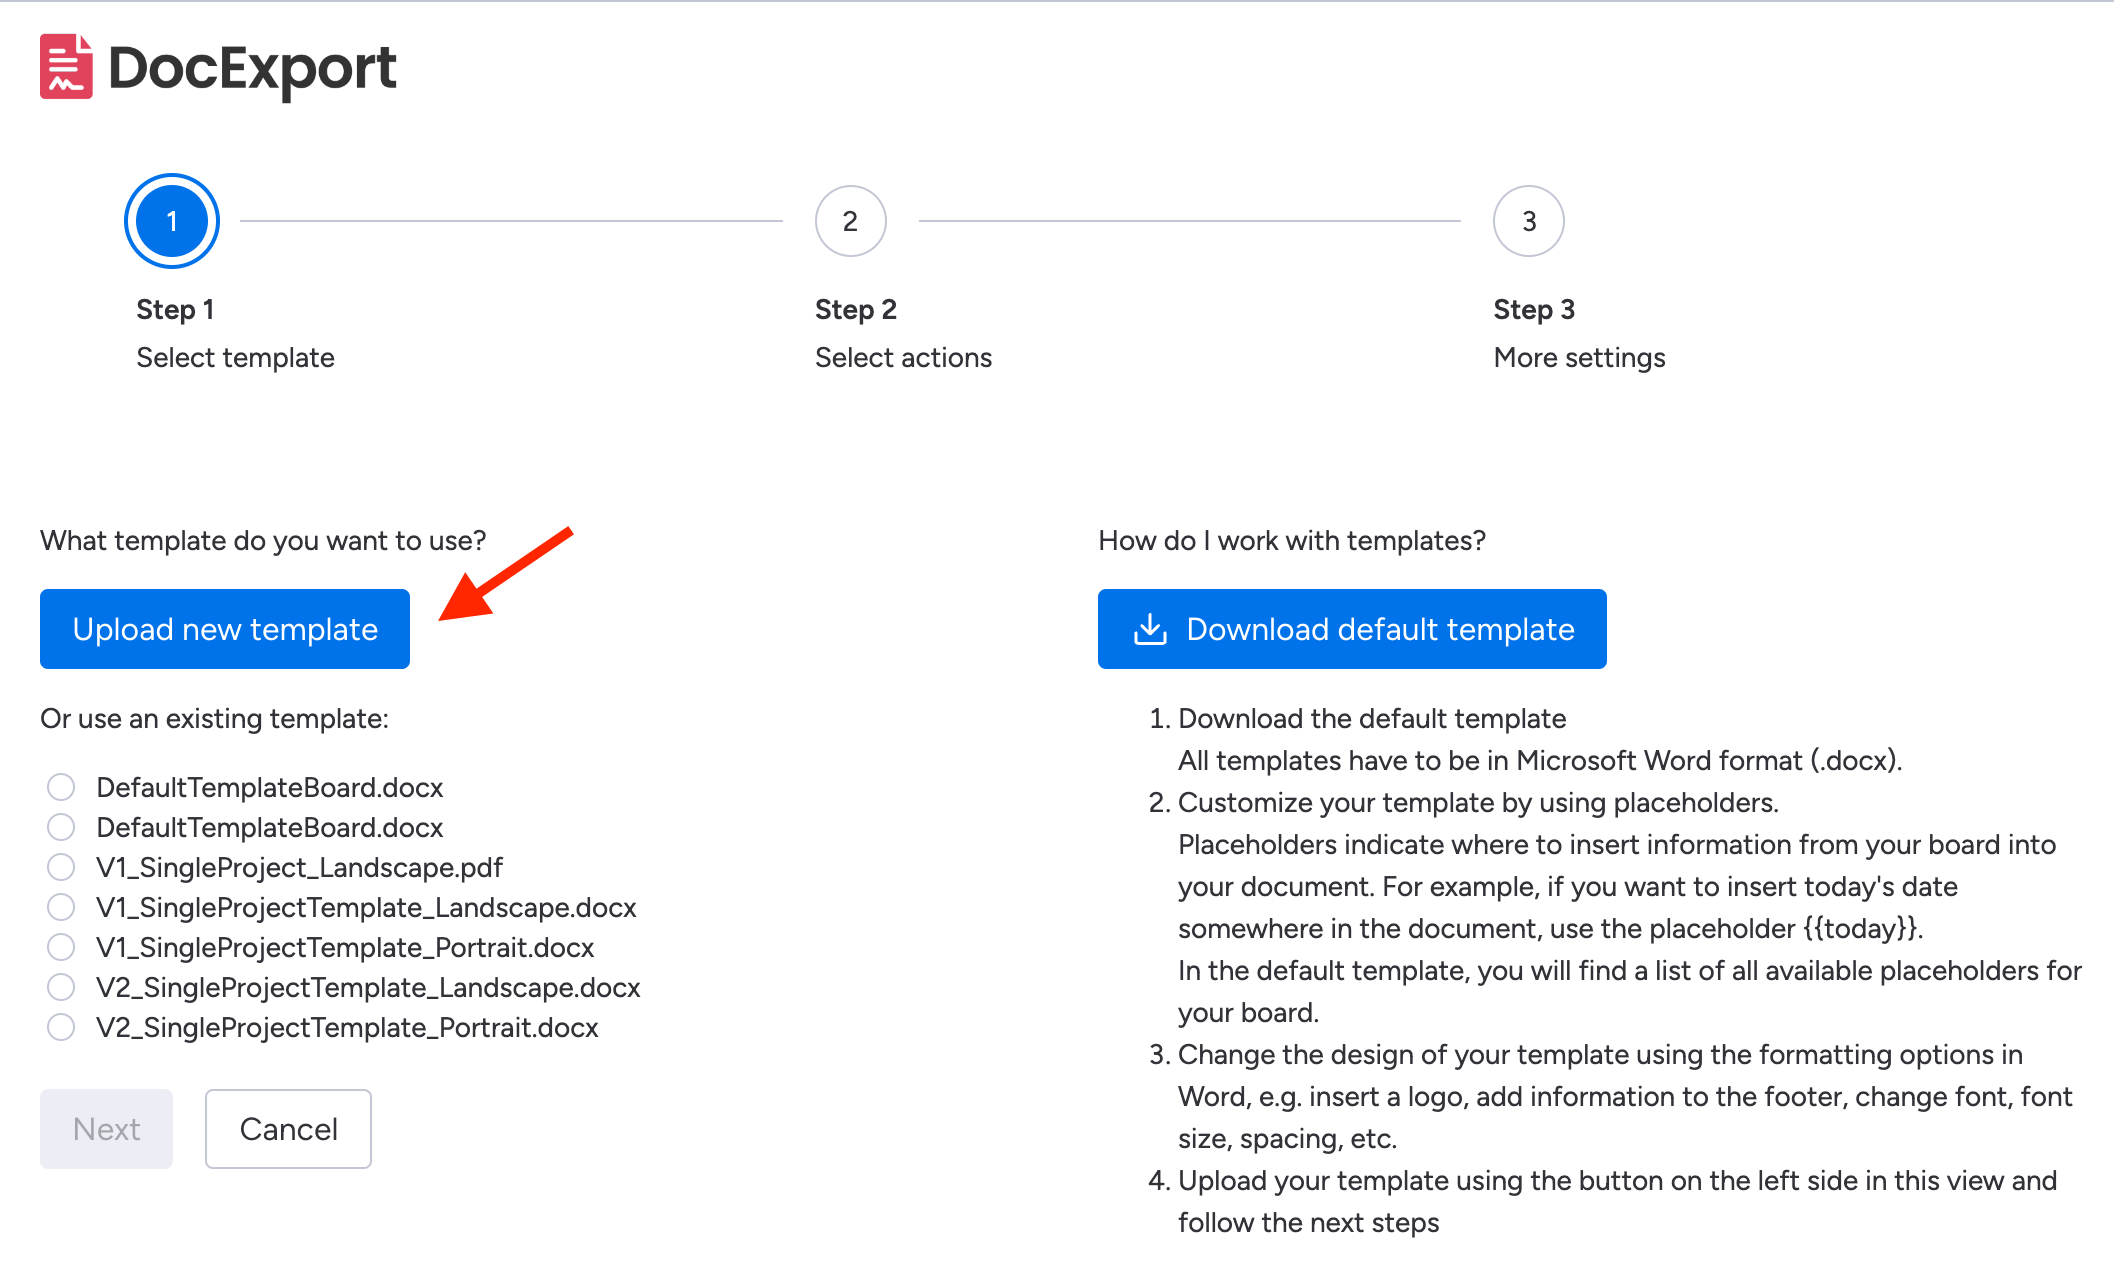
Step 1: Select template
- Upload a new template (.docx) or choose an existing one.
Step 2: Select actions
What should happen with the document after creating it?
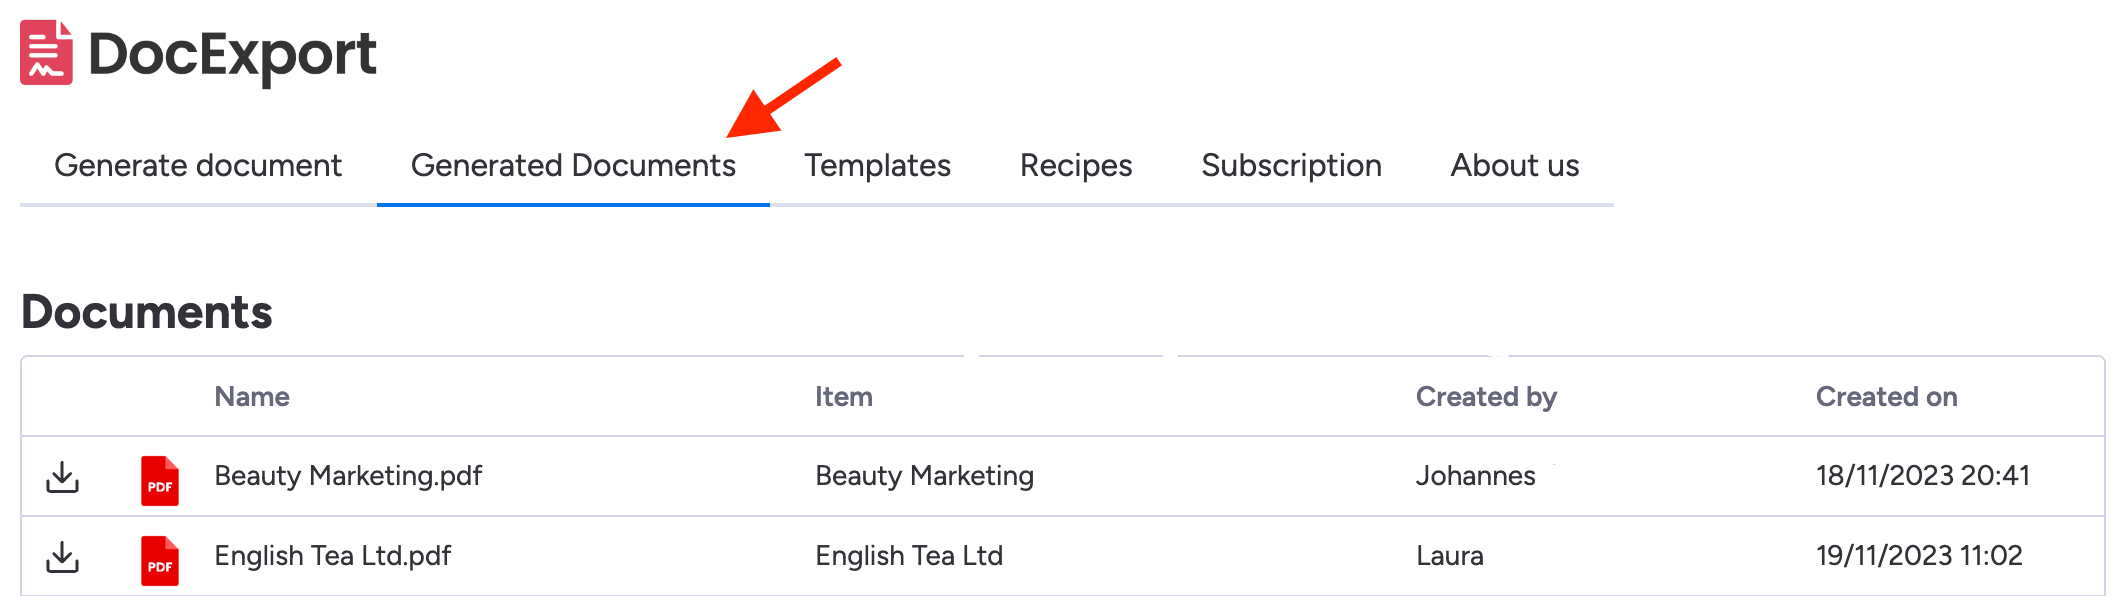
By default, all documents will be saved in the "Generated documents" tab in this view.
Additionally, you can
- Send via email to user himself: Send it to the user who generated the document via email.
- Send via email to email addresses: Send it to others via email by adding one or more email addresses, separated by semicolon.
(e.g. hello@company.com; tom@company.com)
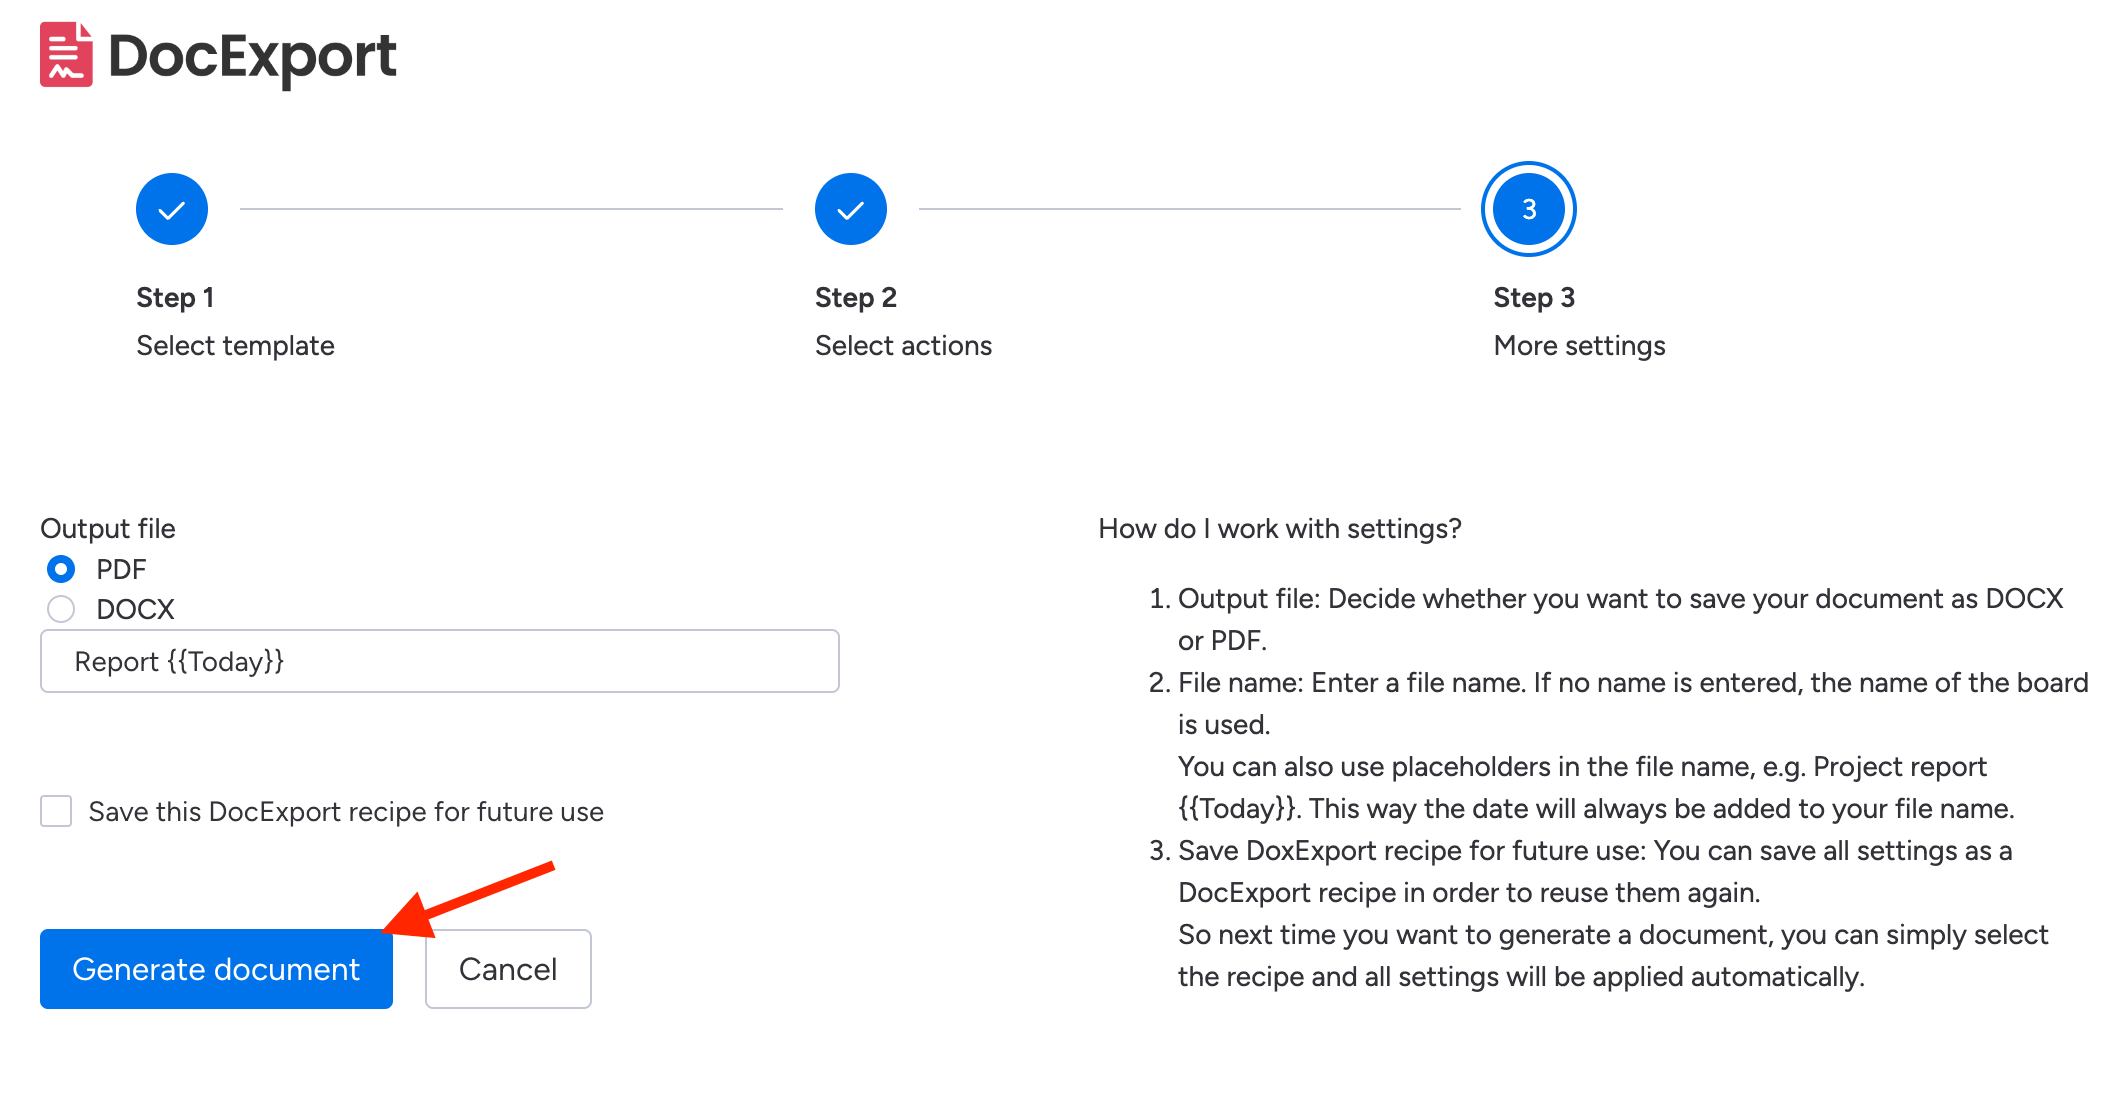
Step 3: More settings
- Output file: Decide whether you want to save your document as docx or PDF.
- File name: Enter a file name. If no name is entered, the name of the board is used.
You can also use placeholders in the file name, e.g. Project report {{Today}}. This way the date will always be added to your file name. - Save DocExport recipe for future use: You can save all settings as a DocExport recipe in order to reuse them again.
So next time you want to generate a document, you can simply select the recipe and all settings will be applied automatically. Find out about automations here.
Generate document
All settings are done. You can now generate and download your document.
Generate a document for a single item
Generate a document for a single item (with subitems) on button click or other event by adding an automation.
e.g. contract, proposal, agreement, certificate, invoice, letter, ...
Choose your starting point
- Open the DocExport View and select the tab "Generate document"
- Click on "Single Item".
Step 1: Select template
- Upload a new template (.docx) or choose an existing one.
Step 2: Select actions
What should happen with the document after creating it?
By default, all documents will be saved in the "Generated documents" tab in this view.
Additionally, you can
-
File to column: File the document to a specific column in your table.
To do this, select an existing column (type “Files”) in your table or create a new column (type “Files”) in advance.
-
Send via email to user himself: Send it to the user who generated the document via email.
-
Send via email to column: Send it to the email address contained in a specific column.
For example, if your table contains a column with the email address of your customer, you can select this column so that the customer receives the document by email.
- Send via email to email addresses: Send it to others via email by adding one or more email addresses, separated by semicolon
(e.g. hello@company.com; tom@company.com)
Step 3: More settings
- Output file: Decide whether you want to save your document as docx or PDF.
- File name: Enter a file name. If no name is entered, the name of the board is used.
You can also use placeholders in the file name, e.g. Project report {{Today}}. This way the date will always be added to your file name. - This DocExport recipe has to be saved in order to use it in your monday automation.
Please specify a name for the recipe so that you can easily identify it later when creating the automation, e.g. "Create contract" or "Send invoice".
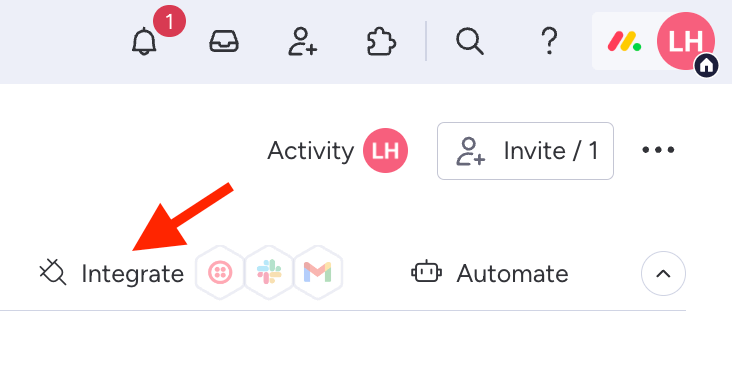
Step 4: Add an integration using your DocExport recipe
In order to create a document for a single item based on the settings you just saved, you need to add an integration to your board.
- Click on Integrate.
- Search for "DocExport" and select it.
- Select one of the integration recipes, that suits your case.
Learn more about automations here. - Fill in the parameters.
- Add the integration to your board. If you now change the status, click on a specific button or a certain date is reached, a document will automatically be created.
FAQ & Troubleshooting
If you have any issues or find a bug, please contact us.
Limitations
If you're generating PDFs for "Single Items" and using the "upload to a file column" feature, the maximum is 200 documents at once.
If you need to generate PDFs for more items, generate your documents in batches of max. 200.
If you're not using the file column feature and want to download in the board view instead, you can generate up to 500 documents in one go.