
Subitem Table
Create tables with your subitems on your documents. Typical use cases are invoices, quotes, meeting minutes on subitem level and so on.
If you have questions, please reach out to us.
Use the instruction from this article to create a Microsoft Word (docx) template from scratch or use one of our free templates as a starting point.
This is an example of how the structure looks like:
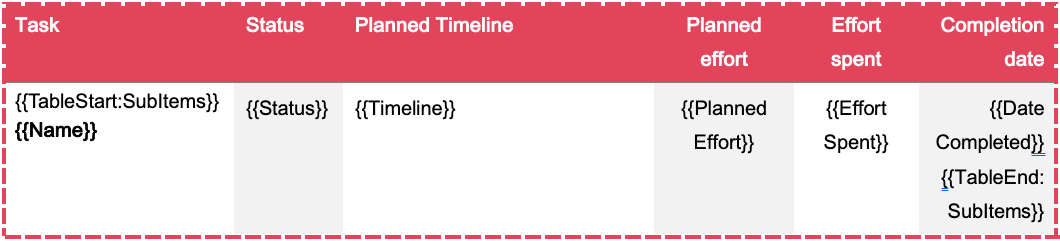
Insert a table in Microsoft Word. Usually, you only need two rows: one for the headings and one for the placeholders.
The second row (left column) needs to start with the placeholder {{TableStart:SubItems}} and ends (right column) with {{TableEnd:SubItems}}
The second row will automatically replicate itself by the numbers of subitems in the exported PDF.
In between, insert the placeholders you want to use in your final document. The logic of the placeholder is: {{ColumnTitle}}
If your subitem column is named 'Due Date', the placeholder would be {{Due Date}} and so on.
The name of the subitem is always {{Name}}
If you want to include the summary of subitems in your table (e.g. total number of hours), please use the native monday.com feature 'Show summary on parent item':
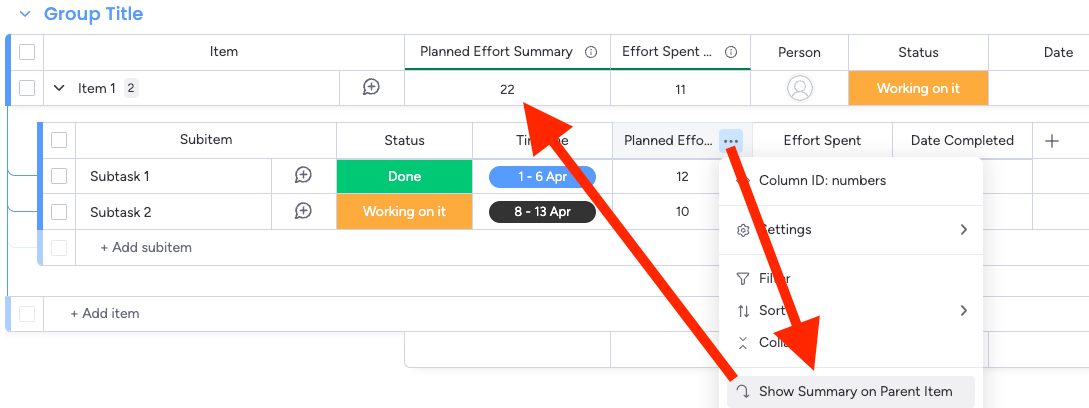
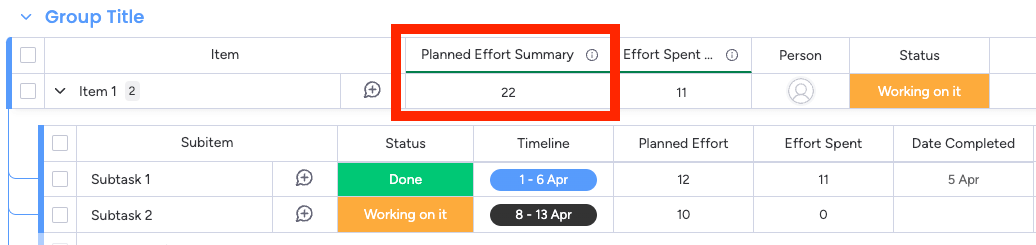
You can now use the column name from the parent item. In our example, we renamed it to 'Planned Effort Summary':
The placeholder is now in the item level and therefore, the structure is {{Item.ColumnTitle}}, in our case {{Item.Planned Effort Summary}} (please make sure to add the prefix Item. before the column title).
You can now insert this placeholder in a third row in your table:
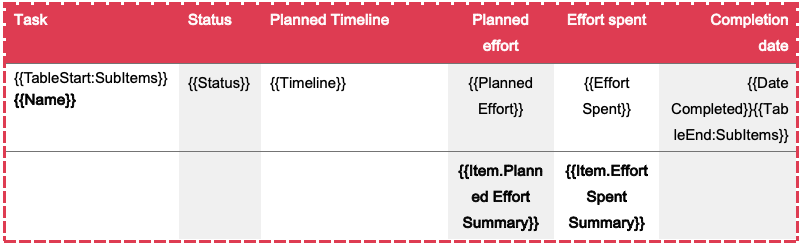
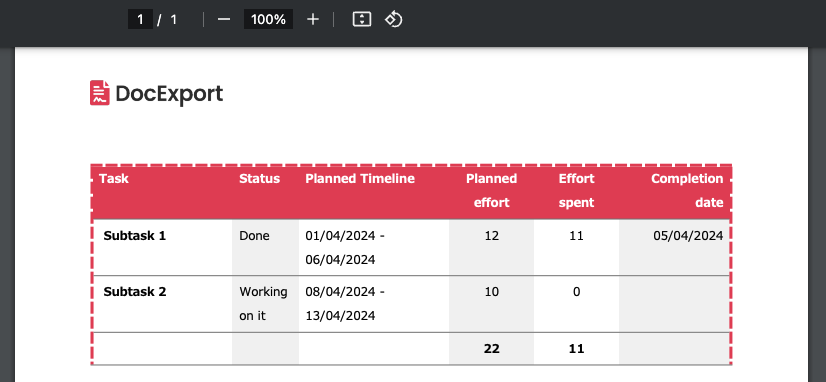
The table on your final PDF would look like this:
You can combine the subitem table with item-level placeholders in one document and create invoices, quotes, reports, meeting minutes, etc.
Get some inspiration from our free Template Gallery.