
Images
Insert your user photo or images from your monday.com board into your document.
Insert images into your document
 Note: Images are not available for the DocExport Free plans.
Insert profile picture
Use this placeholder to output the user profile picture:
{{Image(100;0):User.PhotoSmall}}
Insert image from board (file column)
Use this placeholder to output the image you saved in your monday.com board:
{{Image(100;0):Item.NameOfFileColumn}}
Example:
If your file column title is "picture", the placeholder would be {{Image(100;0):Item.picture}}
If your file column title is "Signature", the placeholder would be {{Image(100;0):Item.Signature}}
Change the size of your image
You can also define the size of the image. To do this, change the part in brackets after Image:
{{Image(100;0):Item.Files}}
The "100" in the placeholder defines the image's width in pixels.
Enter the size of the image in pixels here, separated by a semicolon. If the second value is specified with a 0, the image will be output in aspect ratio.
If you change the {{Image(100;0):Item.Files}} to {{Image(200;0):Item.Files}}, it's double the size on the final document.
You can also specify the size in percent: {{Image(50%;50%):Item.Files}}
Insert images in tables (board level or subitems)
If you want to output images within a table, you don't need the item. prefix.
In this case, you would use {{Image(100;0):Files}} instead of {{Image(100;0):Item.Files}}
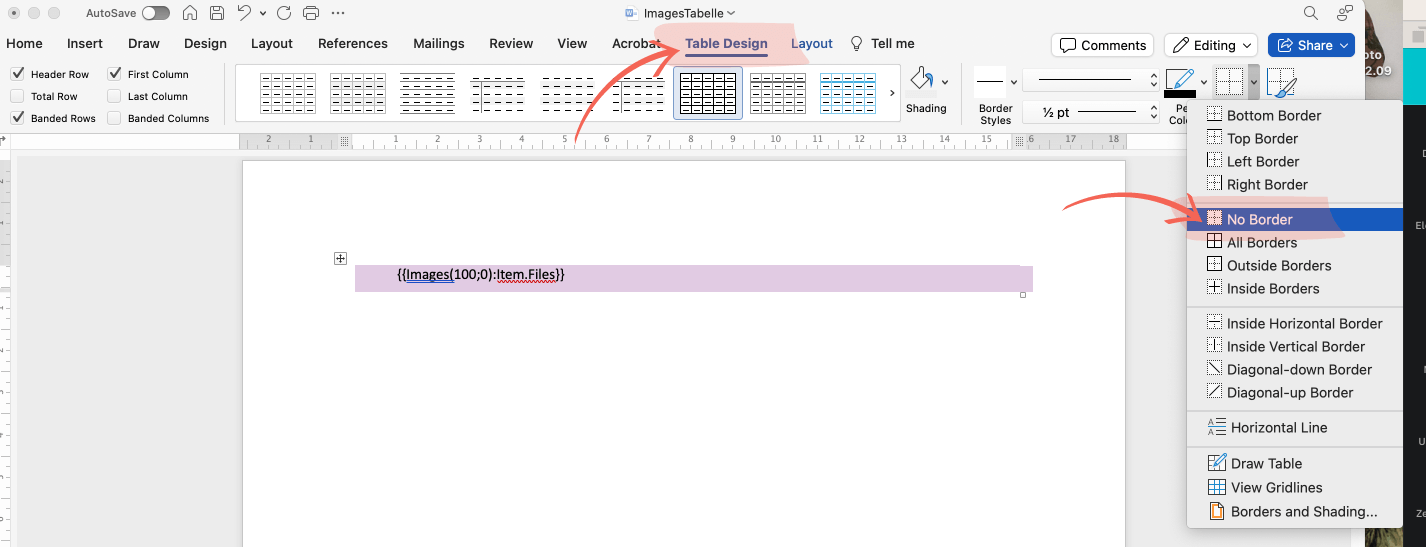
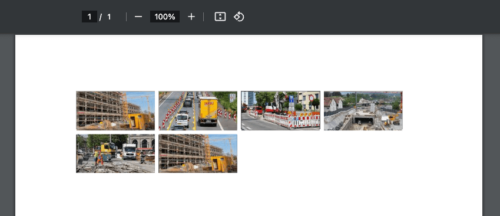
Insert multiple images from board (file column)
If you've saved multiple images in a single file column, you can also output it next to each other.
Use this placeholder to output multiple images from a file column:
Pro tip: By default there is no spacing between multiple images when wrapping to a new line. But there is a workaround:
- Create a table with only one row and one column in your .docx file.
- Insert the placeholder in the table.
- Click on the "Styles Pane" assigned to the placeholder and select "Modify".
- Click on "Format" in the bottom left corner and select "Paragraph".
- Set the line spacing to 1.5 and click on "OK" to save it.
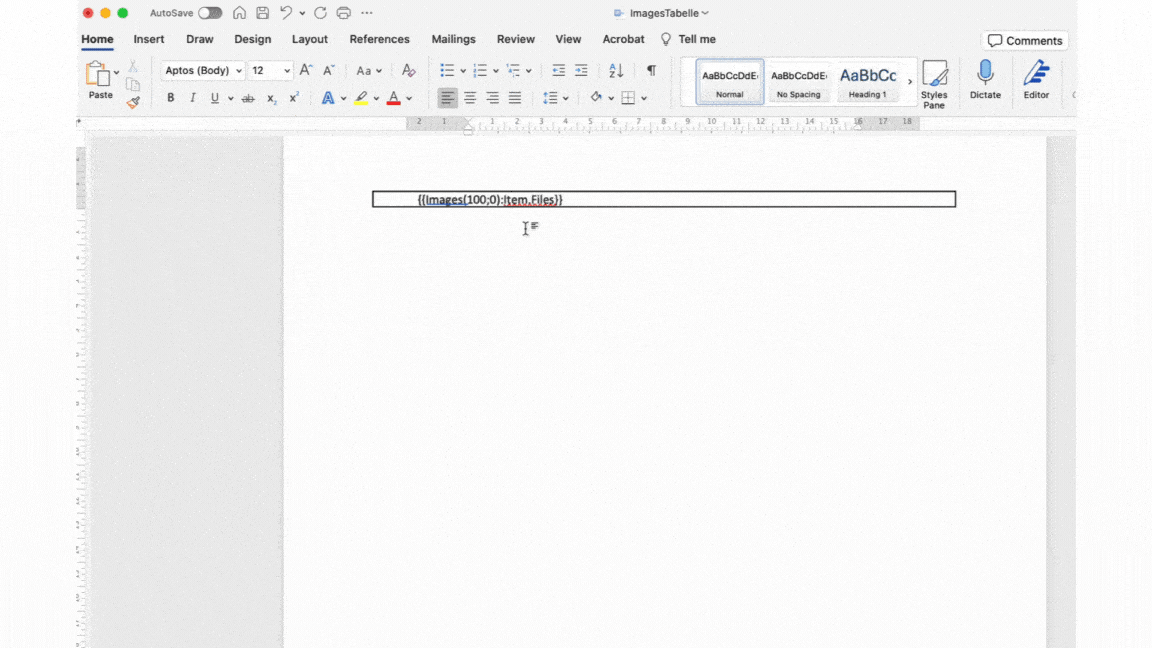
- Perfect, now one last step to make the table virtually invisible.
Go to "Table Design" and set the setting to "no borders" so that the edge of the table does not appear on the document. Done!
A generated document with these settings will look like this:
Apart from this: Insert a static image
You can also add any image as a permanent part of the document, e.g. your logo. If you want to include a static image, you can insert it directly into the Word file.
For example your company logo in the header or footer section.
FAQ
What's the maximum image file size supported in MB?
DocExport reduces the image file size automatically. You don't have to reduce the file size in your file columns.